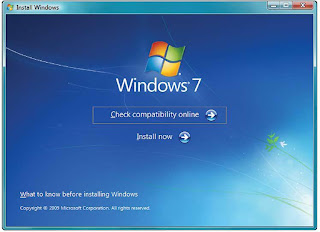
 With a smaller footprint, better performance, multitouch support, and even some eye candy, the Release Candidate of Windows 7 is garnering tons of praise. In my hands-on analysis of the OS (also referred to as build number 7100), I wrote “Quicker to install, more polished and customizable, and easier to use than earlier builds, the Windows 7 Release Candidate (build 7100) is a nice step towards finalization of the operating system.” But enough talk. You’re ready and eager to give it a try yourself. So how to get started? Let me walk you through the decisions you need to make before installing the new operating system, and the steps you need to take to ensure a seamless, troublefree experience.
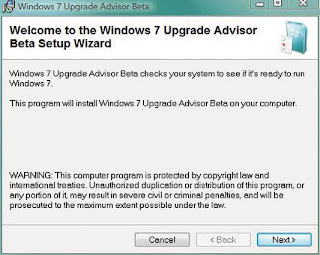 INSTALL THE UPGRADE ADVISOR BETA Once
you’ve figured out where you’re going to install
the OS, this is your next step. The Upgrade
Advisor will make sure there are no compatibility
issues or any other potential problems with
your hardware.
Step 1: Make a Plan
Before all else, make sure you know where you’ll be installing the OS and how you plan to do so. There are three common scenarios: Installing fresh on an older PC, partitioning your hard drive and setting up dual booting, or upgrading a Vista (or earlier Win7 beta) partition. Do you have an older PC that you want to play around with? Or will you be making space on your current PC? Let’s look at each scenario.
CLEAN INSTALLATION If you’ve got an older system, it’s probably running Windows XP, and you’re probably planning on erasing that system and starting from scratch. Good plan. A clean install is the most trouble-free option and should cause you the fewest problems.
UPGRADE You can’t upgrade an XP installation, only a PC running Windows Vista. And you can’t upgrade an existing Windows partition if you boot from the Windows 7 disc. Instead, you’ll boot and run the Windows disc from within your current partition, following the instructions in the autorun app.
PARTITION To enable the partitioning features built into the Windows 7 Release Candidate installer, you need to boot from the disc. But be forewarned: You can’t simply shrink your current partition using the tool (although you can partition from within Windows Vista). The Windows 7 partition tool is really designed to work with raw disk space, meaning it will let you delete and recreate partitions, not resize existing ones. Alternatively, you can use third-party software to resize a partition; I like Paragon Partition Manager, but there are several options available. Stop to think about your time frame here as well. The Windows 7 Release Candidate will stop running on June 1, 2010, at which point you’re going to be forced to buy the darn thing. But don’t worry about writing that date down: Microsoft warns that “starting on March 1, 2010, your PC will begin shutting down every 2 hours. Windows will notify you two weeks before the bi-hourly shutdowns start. To avoid interruption, you’ll need to install a non-expired version of Windows before March 1, 2010.” Some people would label this “annoyingware.” But can you really fault the company for giving you a full year of free usage?
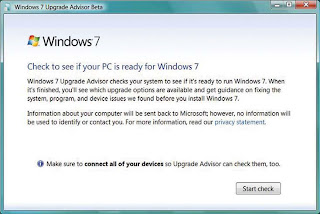 PREPARE TO RUN THE
UPGRADE ADVISOR The
Upgrade Advisor will make
sure your CPU, RAM, hard
drive, and graphics card all
meet the minimum system
specs.
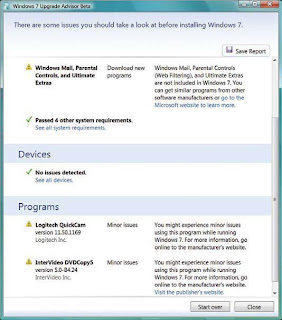 WINDOWS UPGRADE ADVISOR RESULTS The
Upgrade Advisor’s useful “Programs” section
lets you know of any potential software problems.
You might want to consider replacing
software listed here to make sure Windows 7
runs smoothly.
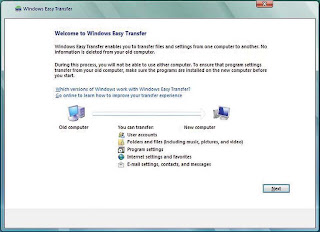 RUN THE EASY TRANSFER
UTILITy This utility allows you
to move your files and settings
from an old PC to an external
hard drive, a network drive, or
a USB flash drive.
Step 2: Prepare
Now, download and run the Windows 7 Upgrade Advisor Beta: It will check your hardware to ensure compatibility and let you know about any potential problems you may encounter. You’ll have to accept a User Account Control prompt before installing (and running) the tool, of course; the Upgrade Advisor will suggest a path to Windows 7, be it an upgrade or a clean install, and will test your CPU, RAM, hard drive, and graphics card to make sure they meet the minimum system specs: I’m an enthusiast—and my PCs are backed up several ways—so I have no problem installing beta software. Even so, I’m leery of installing an unfinished operating system on my main PC; you should be as well. For this reason, you’ll probably find the Upgrade Advisor’s section on “Programs” the most useful to you. Here’s where you can see anything that may present problems for you; in my case, the suspect programs were Logitech’s QuickCam software and an outdated copy of Corel’s DVDCopy. If you see anything crucial, now’s the time to think about replacing the software or figuring out some way to make it work. If you’re upgrading from Windows Vista or installing onto an older PC that you don’t use often, I suggest you try out the Windows Easy Transfer Utility. It lets you migrate your files and system and app settings from that old PC to an external hard drive, network drive, or USB flash drive. Later on you can port all that data and customization back onto your new Windows 7 system. You can search for the Easy Transfer Utility on Vista’s Start menu, or in XP find it under Accessories | System Tools. The utility is pretty simple to muddle through, but for detailed directions, follow along with the step-by-step instructions on Microsoft TechNet.
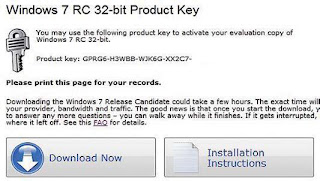 DOWNLOAD THE RELEASE CANDIDATE
Once you’ve entered a Windows Live ID or
signed up for one, Microsoft will generate a new
key, which will activate Windows 7 on up to
three PCs.
Step 3. Download and burn
You can download the Release Candidate and get your own product key through July. To do so, head over to Microsoft’s Windows 7 download page. Follow the download links and enter a Windows Live ID (or sign up for one); the site will generate a new key especially for you. The key will activate Windows 7 on up to three PCs. I’ve knocked the last five characters off my key in the screenshot— you’ll have to get your own! And for once, Microsoft hasn’t restricted the download site to IE users only; users of Firefox can get there as well. The RC is a giant file, of course; the 32-bit version is called “7100.0.090421-1700_x86fre_client_en-us_retail_ultimategrc1culfrer_en_dvd.iso,” and it’s 2.36GB. So to download it, Microsoft uses a Java-based download manager from Akamai Technologies. This is handy, because it means that if the download is interrupted, you’ll find a “Start Download Manager.html” icon on your desktop. You can click it to restart the download, and it will pick up where it left off. Once you’ve downloaded the file, which comes as a disc image called an ISO, you’ll need to turn it into a DVD. I’m a fan of Img-Burn, a lightweight, easy-to-use tool for turning disc images into actual discs. It’s fairly self-explanatory software that should be part of everyone’s standard utility toolkit. When you’ve finished burning the disc, fire up your PC and run the installer. Alternatively, you can copy the files to a USB thumb drive and install the OS from there. This lets you circumvent the whole “burn a DVD” stage, and in theory, the installation from flash memory should be slightly quicker than installation from an optical disc. But in our experience, the process is more complicated than necessary. After all, DVDs are quite inexpensive. Instead, burn a disc with the ISO file and copy the Windows 7 RC to your thumb drive straight off the optical media: It will have all the files necessary to let you boot from the flash drive and will work just as smoothly as a DVD.
 GET IMPORTANT UPDATES
The installer will ask whether
you want to go online to
download any updates. It will
then actually find the updates
for you and download them.
Step 4: Installation
The Windows 7 Release Candidate is designed to install the Ultimate edition of the operating system, even though Microsoft will probably release as many versions of Win7 as there were of Windows Vista. If you’d like, you can “unlock” the other versions of the operating system, which are hidden on the ISO you just downloaded. ZDNet’s Ed Bott points out that to do so, you simply open the Sources folder, find the file Ei.cfg, and delete it. Once you’ve fired up the installer, it will ask whether you’d like to go online to download any updates, and then it will go and actually find the updates you need—what a shock! Vista asks the same question—as did XP, if memory serves—but it never actually seems to download anything. Accept the license agreement and you are ready to rock. The installer will reboot once or twice, and then it will ask you for information about your network, but the process is more or less unattended. Once you’ve finished, you’re free to configure your desktop, set up your libraries, play songs anywhere with Play To, pin apps and documents to your jumplists, and explore all the other cool new features.
Source of Information : PC Magazine July 2009
No comments:
Post a Comment